Pigeon pose often shows up in yoga classes. People tend to love it because it can create an intense stretch in the outside of your hip or buttock (often stretching muscles that are responsible for back pain like the piriformis). And some people also find a stretch in the front thigh of the other leg. So with all that stretching, what’s not to love about pigeon pose?

- It’s not always great for knees – The position of the front leg, requires hip, knee and ankle range of motion. With the front leg twisting at the knee joint, this can put asymmetrical strain on the knee joint – that can cause problems if you are already vulnerable to knee injuries.
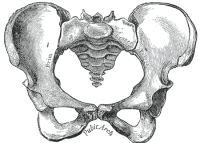
- It’s not always good for the pelvis – The position of the legs puts asymmetrical or uneven strain on the pelvis. This happens because the front leg is flexed and rotating out, while the back leg is extended and may also rotate outward. With the legs in this position, it can put uneven strain on the sacroiliac joint (SI joint), which can lead to injury or chronic strain on the joint.
These risks tend to be harder to manage as pigeon pose moves the hip and knee joints towards an end of range of motion AND then increases the pressure on these joints at that end range by relying on body weight to create the stretch or move further into the position.
The knee and hip/pelvis are key joints essential to our everyday movement and life. They are also more likely to have injuries and issues, particularly as we age with normal wear and tear. There are plenty of other options and variations that give you the same stretch benefits for the hips without the same level of risks.
As every body is different, this pose really works for some people and can still be ok for their knees and hips.
We’ll start first with how to get in to the position:
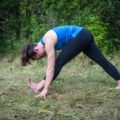
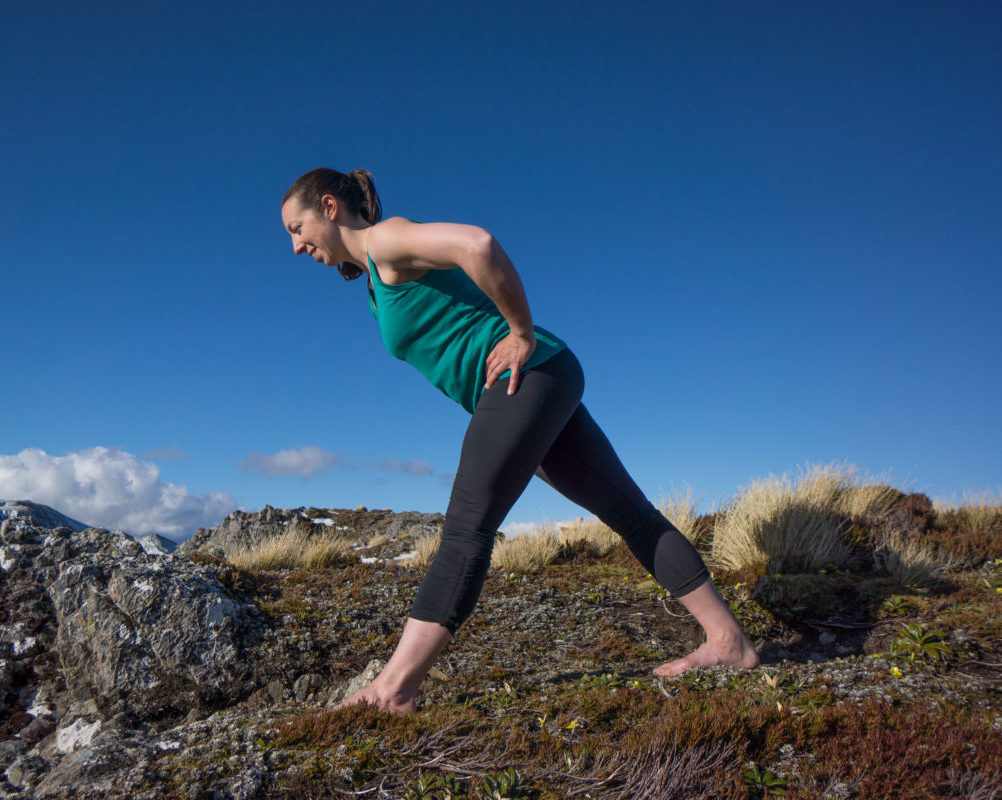
- Start from hands and knees or down dog. Bring your left knee forward on to the floor just behind or inside your left wrist.
- Move your left foot slightly to the right on the floor. You’ll find that your left lower leg is slightly diagonal to your left upper thigh.
- Find a comfortable position for your left foot. In the past, we have advised flexing the left foot to protect the knee joint. But that doesn’t always work to protect the knee and can cause pain in the left ankle. So find a position for your left foot that is comfortable and avoid forcing the foot or ankle into any specific position.
- Lower your right back knee to the floor. You may need to move this leg back a little to be able to gently lower your hips towards the floor.
- If comfortable, walk your hands forward and lower your belly and chest down towards the floor. Depending on your flexibility, you might be able to put your elbows on the floor.
And now a few tips to look after your body if you’re going to try pigeon pose:
- For many of us, the hip of the front leg won’t sit on the floor. That’s fine, but avoid rolling out to the side to let that hip rest on the floor – when you do this it puts further torque or strain on the pelvis and SI joint.
- You can reduce the intensity of the stretch and the strain on your joints, by sitting your front hip on something. Following the directions above, put a pillow under your left hip. Use enough support that your left hip is comfortably ‘sitting’ on the pillow.
- Make sure when you bring your knee forward that you keep it in-line with the hip. Sometimes it can intensify the stretch and feel easier on the knee, if you move the knee further out to the side (eg – from the example above putting your left knee outside your left wrist). However this encourages the front leg to rotate externally and puts extra strain on the SI joint.
- To make it easier on your front knee, don’t force the lower front leg further out to the side – in fact you can keep the left foot reasonably close to your front thigh and still get a good stretch.
- If you do feel discomfort in your front knee, stop and choose another pose. There aren’t many ways to resolve this discomfort and it’s putting strain on your knee that’s not safe.
- Try keeping the toes tucked under of the back leg. Use those toes to push the hip of the back leg forward and at the same time feel as if your pulling the front hip backward. The hips don’t need to move, but the muscle action will help keep the pelvis and SI joints stablised. If you have quite flexible hips, you might also find that actually moving the back leg and hip ever so slightly forward will help slightly square your hips and can intensity the stretch while also keeping your pelvis in a safer position.
You could probably argue that any anatomical movement or position in yoga could pose a risk of injury if it’s not done carefully or if you are prone to injuries in certain joints. But the risk is lower or higher in some positions, and some joints are more vulnerable.
And the question is, what’s the point and is the risk worth it? Next time you try pigeon pose, pay closer attention to what you feel in your front knee and the pelvis, especially the SI joint (at the back of your hips).
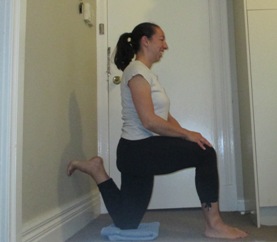
Or better yet, try my favourite alternative to pigeon pose, fire log pose (Agnistambhasana). Read my how to for this pose or watch the video.
A little note about the name. Pigeon pose is often used in English language yoga classes to refer to a more mild version of eka pada rajakapotasana which is known as one-legged king pigeon pose – a far more complex position!